
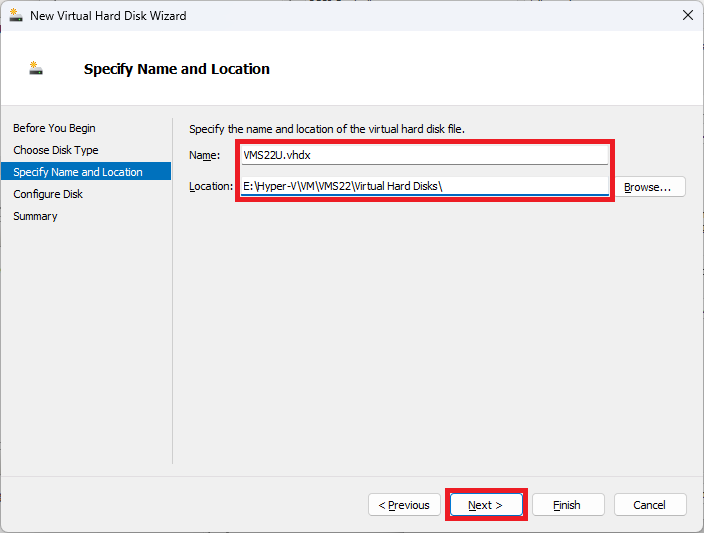
Create a New Virtual Hard Disk
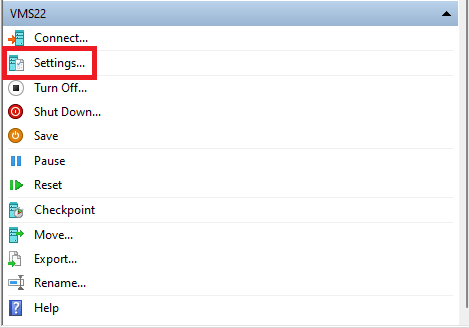
- Select the virtual machine.
- In the Actions pane, click on Settings.
- Click on SCSI Controller.
- Select Hard Drive then click Add.
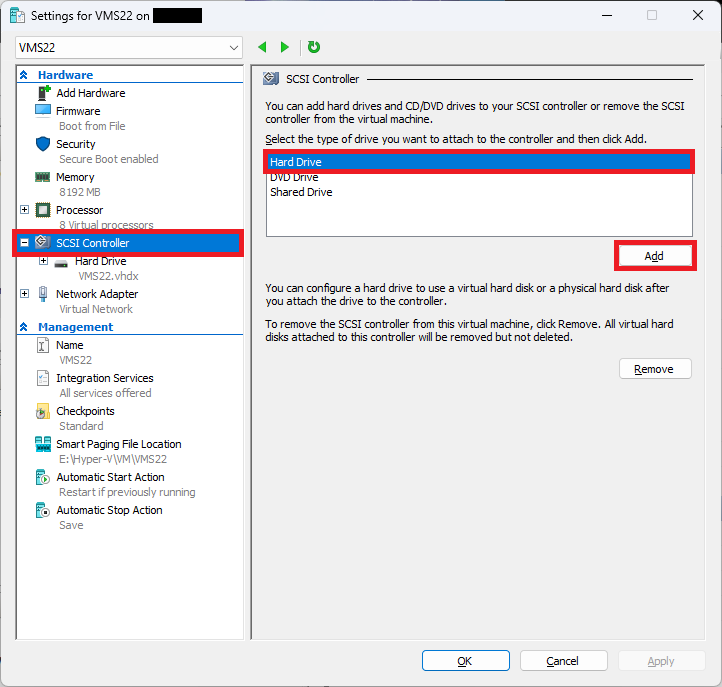
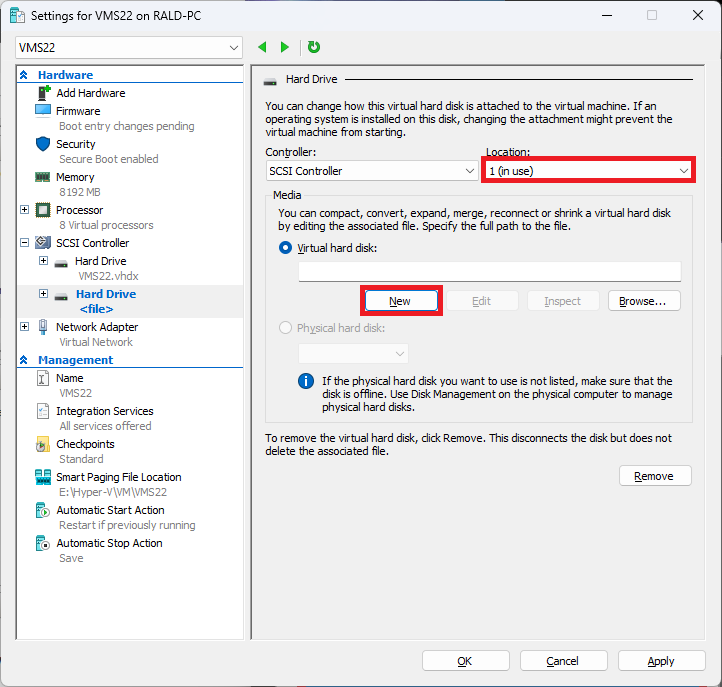
- Click New to create a new virtual hard disk.
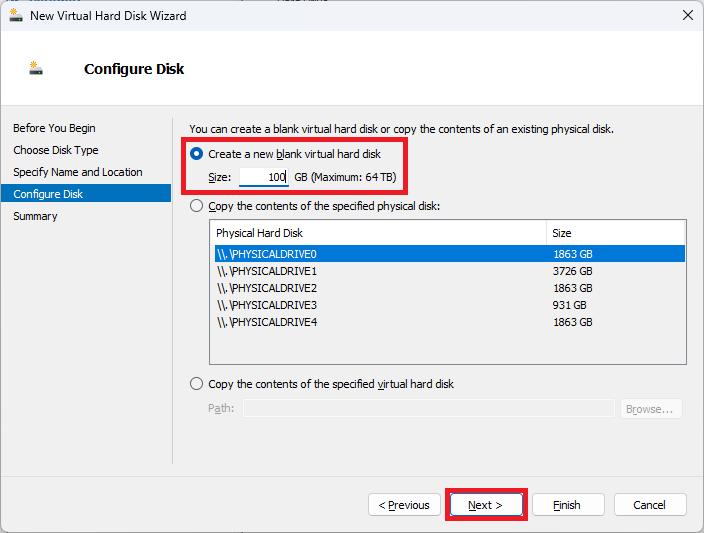
Configure the New Hard Disk
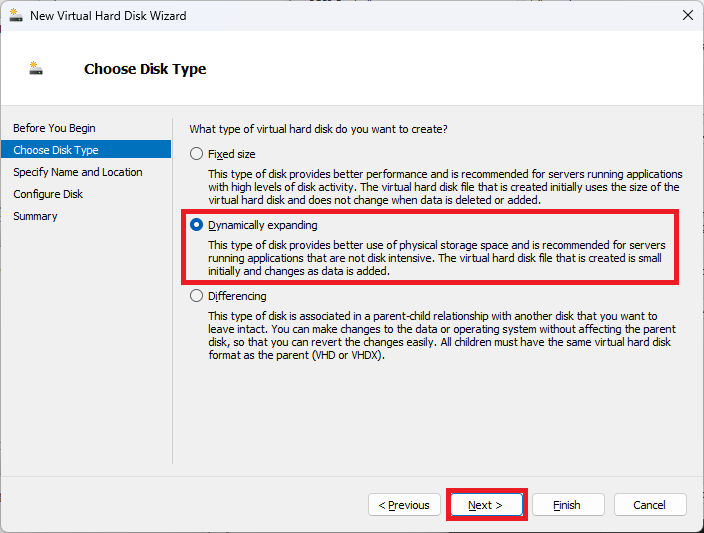
- Select Dynamically expanding.
- Enter a name for the additional drive and save it in the VM’s existing Virtual Disk folder.
- Adjust the disk size as needed.
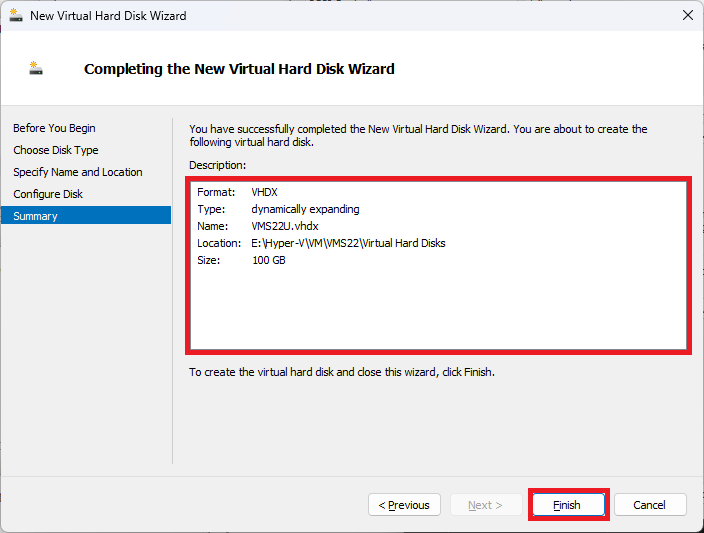
- Review the virtual disk information and click Finish.
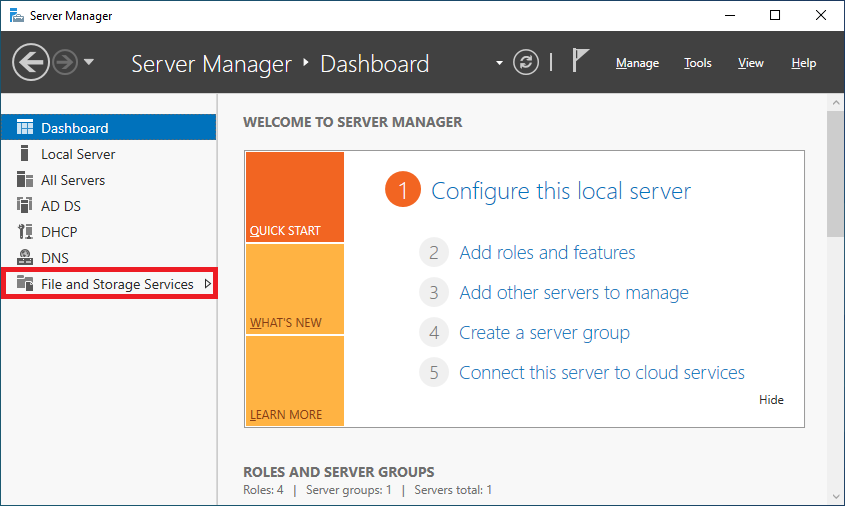
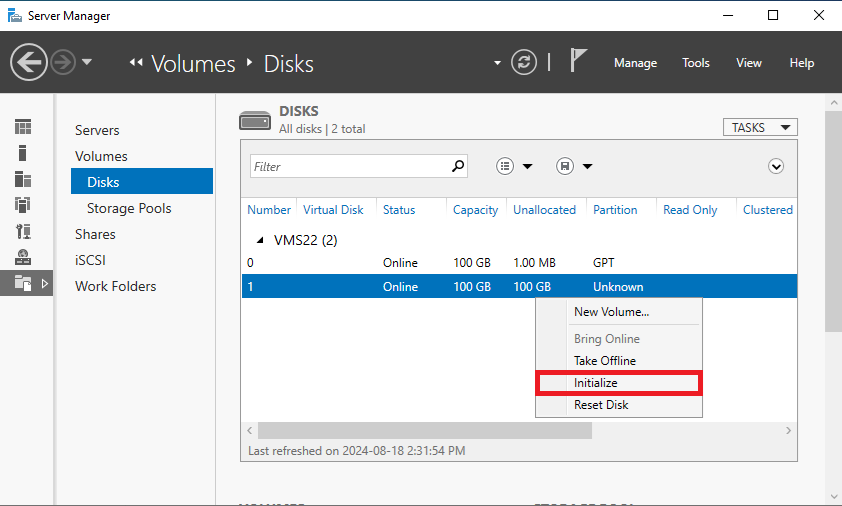
Initialize and Configure the New Disk
- Open Server Manager.
- Navigate to File and Storage Services > Volumes > Disks.
- Right-click on the new disk and select Bring Online.

- Right-click again and select Initialize.
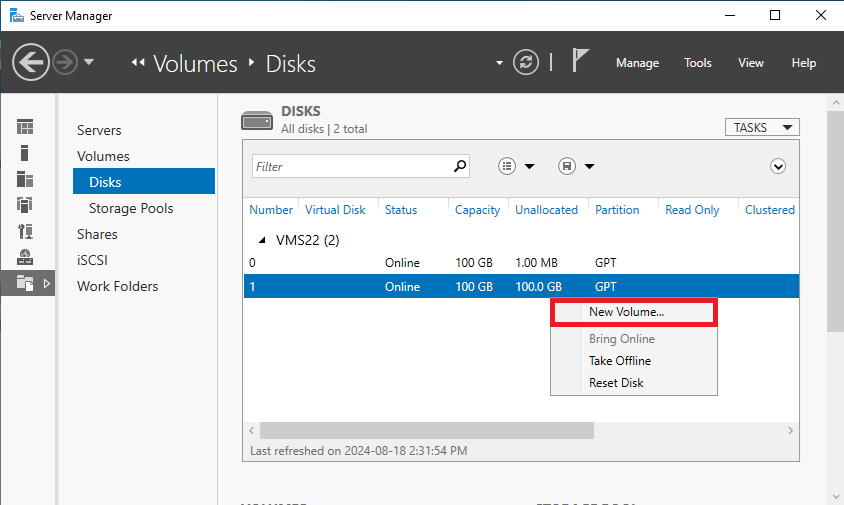
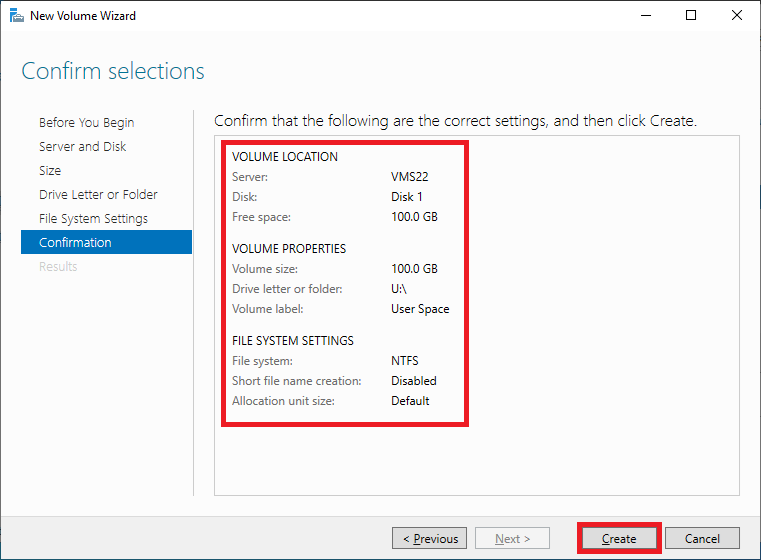
- Right-click once more and select New Volume.
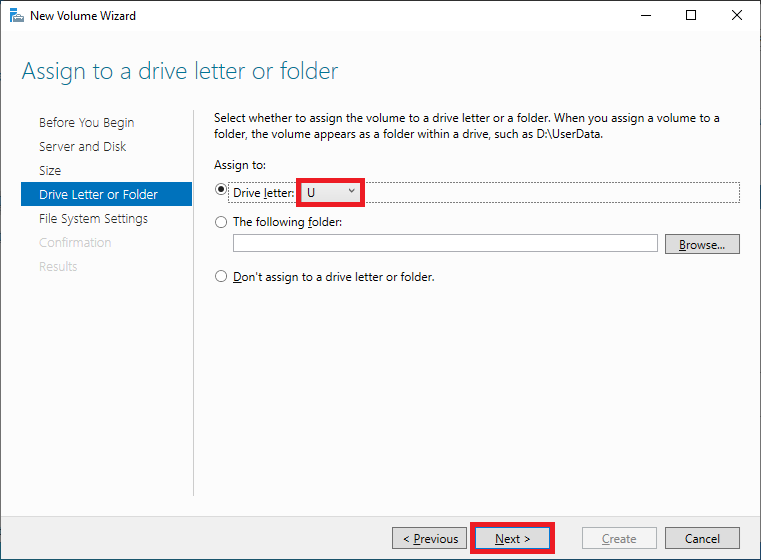
- Assign a drive letter and click Next.
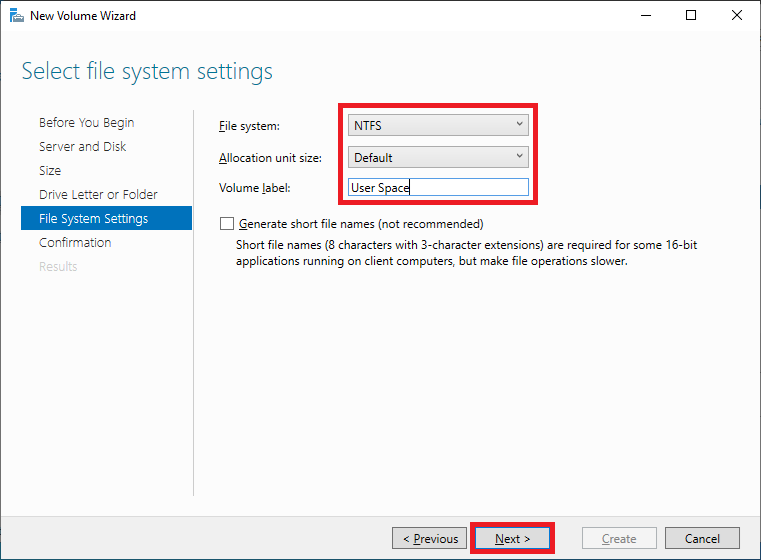
- Enter a Volume label and click Next.
- Review the volume information and click Create.
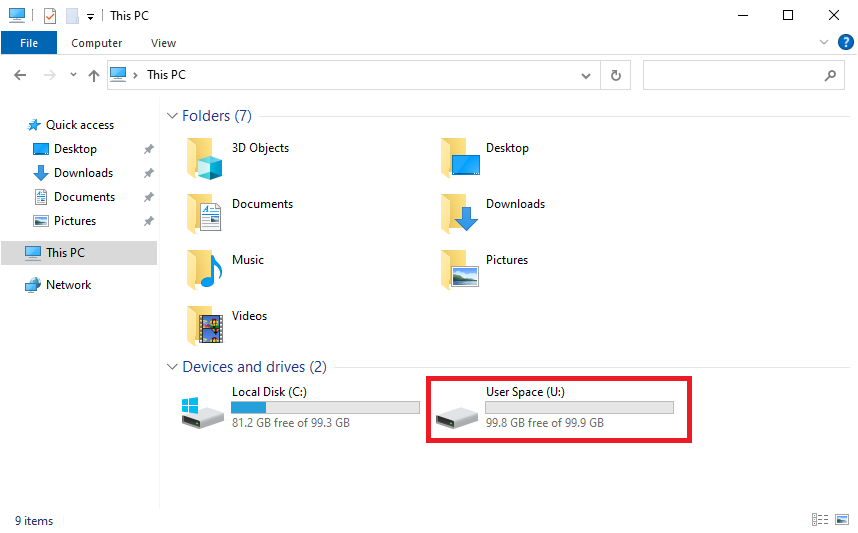
Verify the New Volume
- Open File Explorer.
- Click on This PC to ensure that the new drive appears and is accessible.
2 thoughts on “Adding an Additional Drive to an Existing VM in Hyper-V”