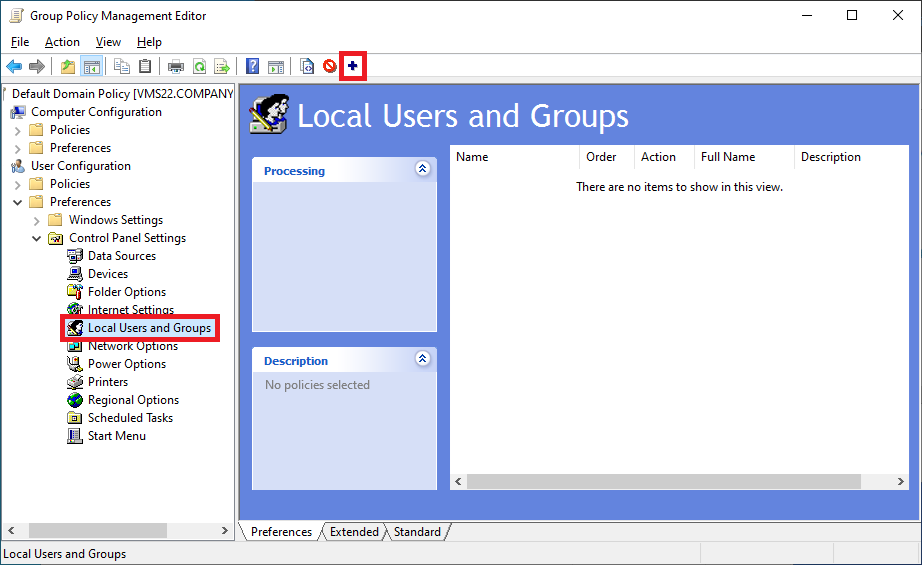
Configure Local Group Settings
- Open Group Policy Management.

- Expand your domain node to locate the Default Domain Policy.
- Right-click on Default Domain Policy and select Edit.

- Navigate to:
- User Configuration > Preferences > Control Panel Settings > Local Users and Groups.
- Click the + icon or right-click in the right pane and select New > Local Group.
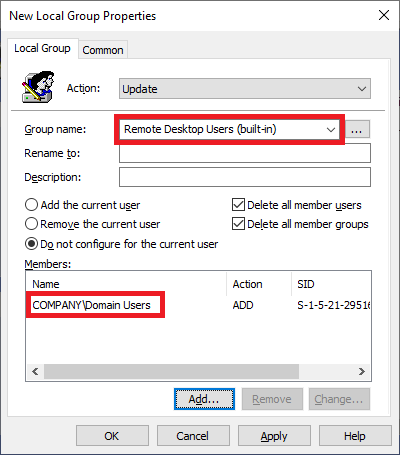
- Set Up the Local Group:
- Group Name: Select Remote Desktop Users (built-in) from the dropdown list.
- Check both Delete all member users and Delete all member groups.
- Click Add.
- Search for the Domain Users security group in Active Directory, select and click OK.
- Go to the Common tab.
- Check the Item-level targeting option.
- Click the Targeting button to configure targeting settings.

- In the Targeting Editor, click New Item and select Domain.

- Click the button next to NetBIOS domain name, select your domain from the list and click OK.
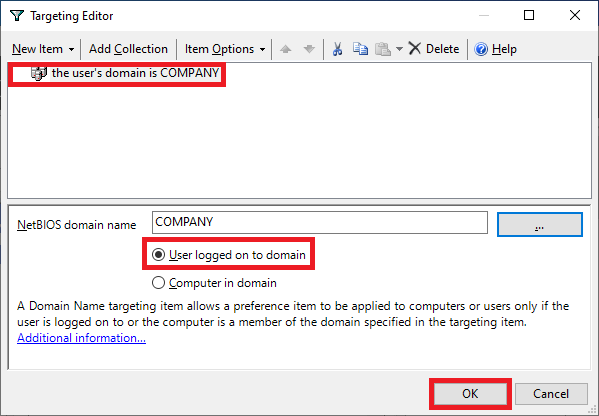
- Click OK to close the Targeting Editor then OK again to close the Local Group Properties window.
- Navigate to:
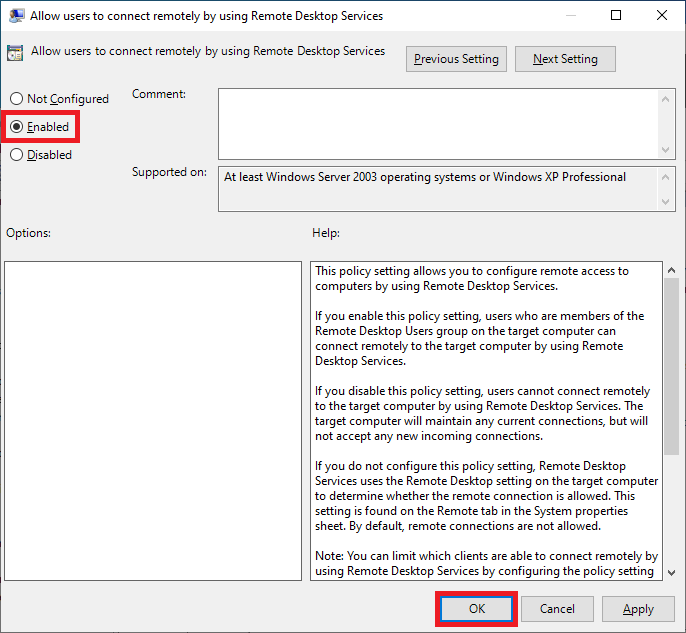
- Computer Configuration > Policies > Administrative Templates > Windows Components > Remote Desktop Services > Remote Desktop Session Host > Connections.
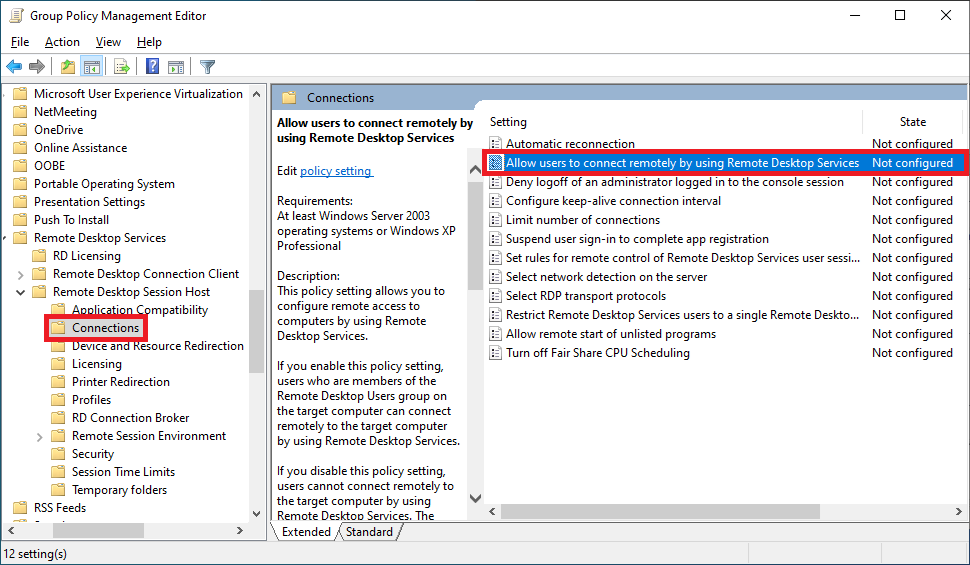
- Enable the policy Allow users to connect remotely by using Remote Desktop Services.
- Computer Configuration > Policies > Administrative Templates > Windows Components > Remote Desktop Services > Remote Desktop Session Host > Connections.
Configure Remote Desktop Services Settings
- Navigate to:
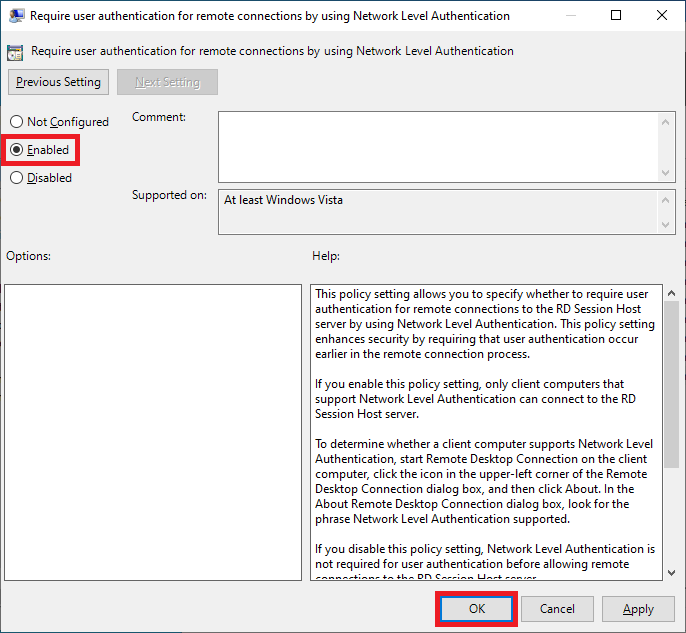
- Computer Configuration > Policies > Administrative Templates > Windows Components > Remote Desktop Services > Remote Desktop Session Host > Security.
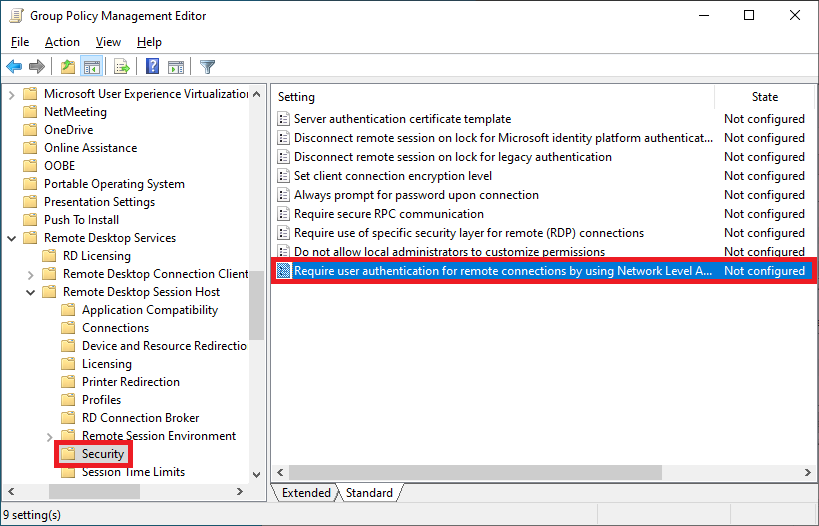
- Enable the policy Require user authentication for remote connections by using Network Level Authentication.
- Computer Configuration > Policies > Administrative Templates > Windows Components > Remote Desktop Services > Remote Desktop Session Host > Security.
Configure Windows Firewall Rules
- Navigate to:
- Computer Configuration > Windows Settings > Security Settings > Windows Defender Firewall with Advanced Security > Inbound Rules.
- Right-click on Inbound Rules and select New Rule.

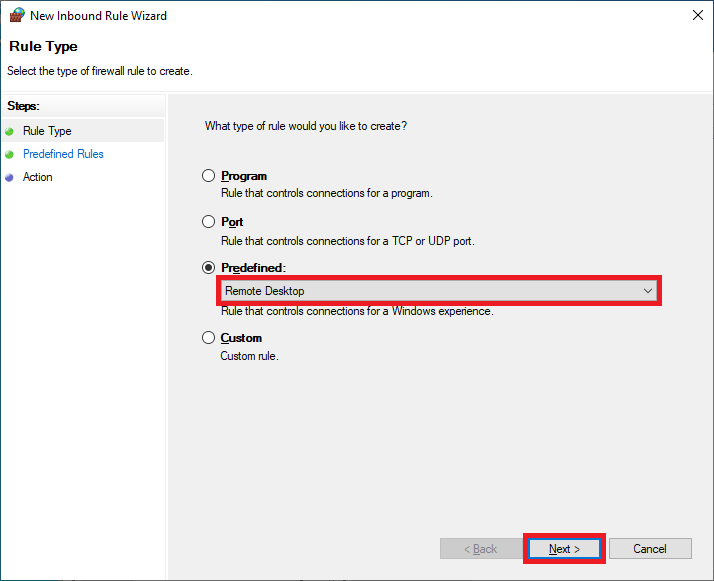
- Choose Predefined and select Remote Desktop then click Next.
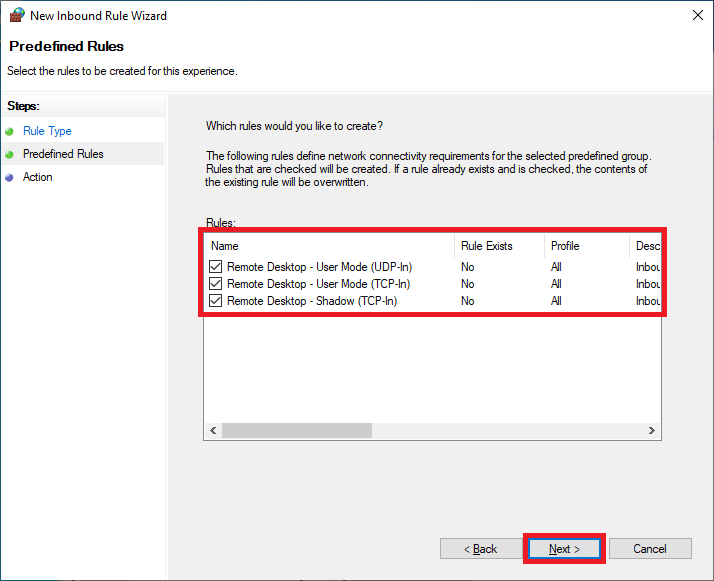
- Ensure all related rules are checked and click Next.
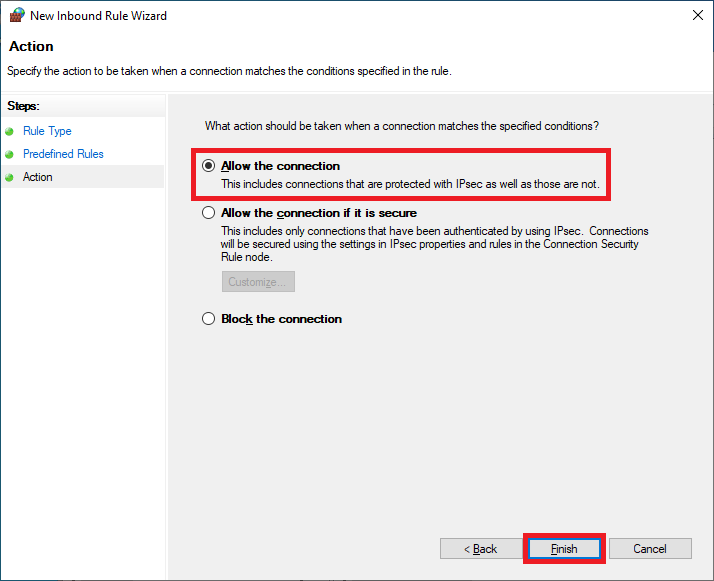
- Select Allow the connection and click Finish.
Add a User to the Remote Desktop Users Group
- Open Active Directory Users and Computers.
- Navigate to the Domain Users OU.
- Right-click on the user account and select Add to a group.
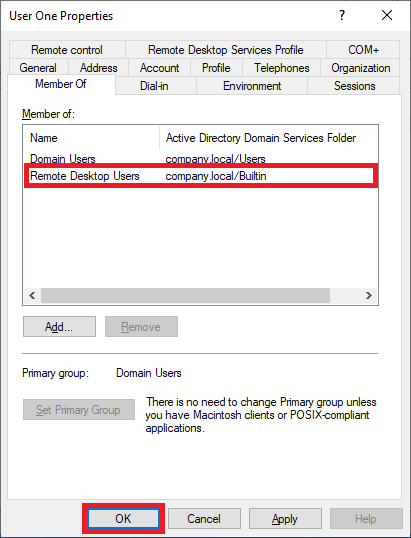
- Type Remote Desktop Users.
- Click Check Names to validate the group name.
- Click OK to add the user to the Remote Desktop Users group.
Verify Remote Access Configuration
- Use a domain account to log in to a computer that is connected to your domain.
- On the Hyper-V menu, click View and select Enhanced Session.
- Try logging in to the remote computer with your domain credentials.
- If you are able to log in successfully and access the remote desktop, the configuration has been applied correctly.